I originally posted a recipe for European Peasant Bread in April, 2013 – seven years ago! Back then I was joyfully eating all types of gluten and baking bread on a regular basis. I didn’t go wheat-free until 2014 when I chose to give it up to help with the inflammation that was contributing to osteoarthritis in my hands. So it was a choice, not a dietary necessity like it would be for someone with celiac disease. And, I still eat barley and rye – the other two grains that contain gluten.
While I quickly found a good gluten-free substitute flour (Cup4Cup) for most of my baking and cooking needs, nothing compares to using real wheat flour for making bread. Gluten-free breads have improved during the six years since I first tried them but they still don’t compare to the real thing.
During this time I heard from a few people who had stopped eating wheat that when they traveled to Europe they were able to enjoy bread and pasta made with wheat flour and still feel great. Upon some research I learned that European wheat hasn’t been genetically modified like American wheat. This modification has been linked to many health issues including inflammation (and osteoarthritis).
In the back of my mind, I thought I should start importing European wheat – sadly I never followed through on that thought. However on trips to Iceland, France and Italy over the last year and a half I did test out the European wheat theory and am thrilled to say I felt (and continue to feel) fine. I was so happy to be able to enjoy bread, pastries and pasta while traveling to France and Italy that I even bought a sandwich in the Rome airport for the plane ride home knowing it would be my last good bread for a long time. Even airport food in Italy is good!
A few months later my friend, Sharon G, who also stays away from wheat, went to France and she, too, enjoyed all the famous French foods made with wheat. She and her husband, David G, had the brilliant idea of going to a French grocery store and doing some research on French flour. Back home they were able to order that very same French flour (Francine Farine de Ble Bio – French All Purpose Organic Wheat Flour) on Amazon and so nicely shared the brand with me.
Meanwhile, I was exploring non-GMO flour made in the United States – essentially going back to before our wheat was so genetically modified. My parents brought me some small batch, non-GMO flour from Full and By Farm (their CSA up on Lake Champlain in New York).
I’m pleased to report that I have made a few batches of bread and some waffles with both the French flour and small batch American flour and have experienced no problems or pain in my hands.
You can read more in my original post about European Peasant Bread and the technique behind it. But it bears mentioning that this is a very easy and forgiving bread recipe. It takes very little active time and produces a high quality bread. I used to have a fear of baking with yeast and this recipe got me over that.
I realize that I usually post options for a truly gluten-free experience, but in this case I wanted to share my very non-scientific research on alternatives for people who may be gluten-free by choice. I’m not suggesting this to a person with celiac disease. If you’ve had a similar experience with European or non-GMO American flour, I’d love to hear about it.
The Cost: I’ve ordered this French flour a few times and the price does fluctuate a bit. It’s more expensive now than usual (likely a result of the COVID-19 pandemic). Good gluten-free flour is about the same in cost and doesn’t make good bread, so for me it’s worth splurging on as I don’t eat a lot of flour in general.

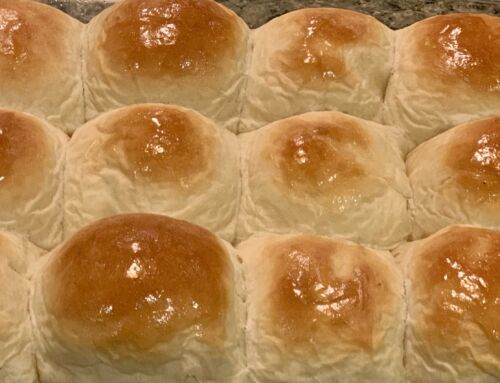
European Peasant Bread
Ingredients
- 3 cups lukewarm water about 100°F/body temperature
- 1-1/2 tablespoons granulated yeast 2 packets
- 1-1/2 tablespoons Kosher salt
- 1 cup rye or whole wheat flour or combination of both
- 5-1/2 cups unbleached all-purpose European or small batch non-GMO American flour see Notes
- Cornmeal for the pizza peel or parchment paper - note
Tools:
- Thermometer
- 5 quart plastic container with lid
- Pizza peel metal or wood
- Baking stone
- Lame bread slashing tool optional
Instructions
Preparation Day – Select Your Method:
- Spoon/Hand Method: Mix yeast, salt and water in a 5-quart plastic container with lid. Add the rye and/or whole wheat and all-purpose flours and mix without kneading using a spoon. You may need to use wet hands to incorporate the last bit of the flour. Cover (not airtight) and rest it at room temperature until the dough rises and collapses, about 2 hours. Refrigerate the dough covered (not airtight) and use over the next 14 days (you can use the dough immediately but it’s easier to work with when cold – I recommend at least one hour in the refrigerator if you have the time).
- Stand Mixer/Food Processor Method: Using a stand mixer fitted with a dough hook or a 14-cup food processor with dough attachment, mix yeast, salt and water in a 5-quart plastic container with lid. Add the rye and/or whole wheat and all-purpose flours and mix without kneading. Transfer dough to 5-quart plastic container with lid. Cover (not airtight) and rest it at room temperature until the dough rises and collapses, about 2 hours. Refrigerate the dough and use over the next 14 days (you can use the dough immediately but it’s easier to work with when cold – I recommend at least one hour in the refrigerator if you have the time).
On Baking Day:
- Dust the surface of the dough with flour and use a serrated knife to cut off a 1-pound piece (about the size of a grapefruit). Dust with more flour and quickly shape it into a ball by stretching the surface of the dough all around to the bottom on all four sides, rotating the ball a quarter-turn as you go. It should be smooth on all sides. Allow dough to rest and rise on a cornmeal or parchment paper covered pizza peel for 40 minutes.
- About 20 minutes before baking, set a baking or pizza stone in the center of the oven and preheat it to 450°F. Also, place an empty broiler tray on a different oven rack.
- Before the bread goes into the oven, sprinkle the dough liberally with flour and use a serrated knife or lame bread slashing tool to cut slits or “scallops” (think tic-tac-toe) across the top. Leave the flour in place for baking. Slide the dough onto the baking stone and pour 1 cup of hot water into the broiler tray. Quickly close the oven door.
- Bake until the crust is browned and firm, about 35 minutes. If you’re using parchment paper, remove the paper from the oven after 25 minutes. Smaller or larger loaves will require some adjustment in baking time.
- Allow to cool before slicing or freezing.
Notes
* Yeast: I use Active Dry Fleischmanns Yeast
* Cornmeal or Parchment Paper: I prefer parchment paper as it’s easier to use and I don’t get cornmeal all over the bottom of my oven.
* Recipe can be easily be cut in half or doubled. You can make larger loaves – just increase the cooking time.
* Bread freezes well. Wrap in aluminum foil and a ziplock bag.

Source: Adapted from Jeff Hertzberg, M.D. and Zoë François’ Artisan Bread in Five Minutes a Day: The Discovery That Revolutionizes Home Baking (2007)

Leave A Comment