I know it’s January and you might be trying to avoid sweets after the sweet-filled holiday season. The great thing about these delicious bars is that they can be cut into any size you like. So if you want a little indulgence, simply cut a smaller square.
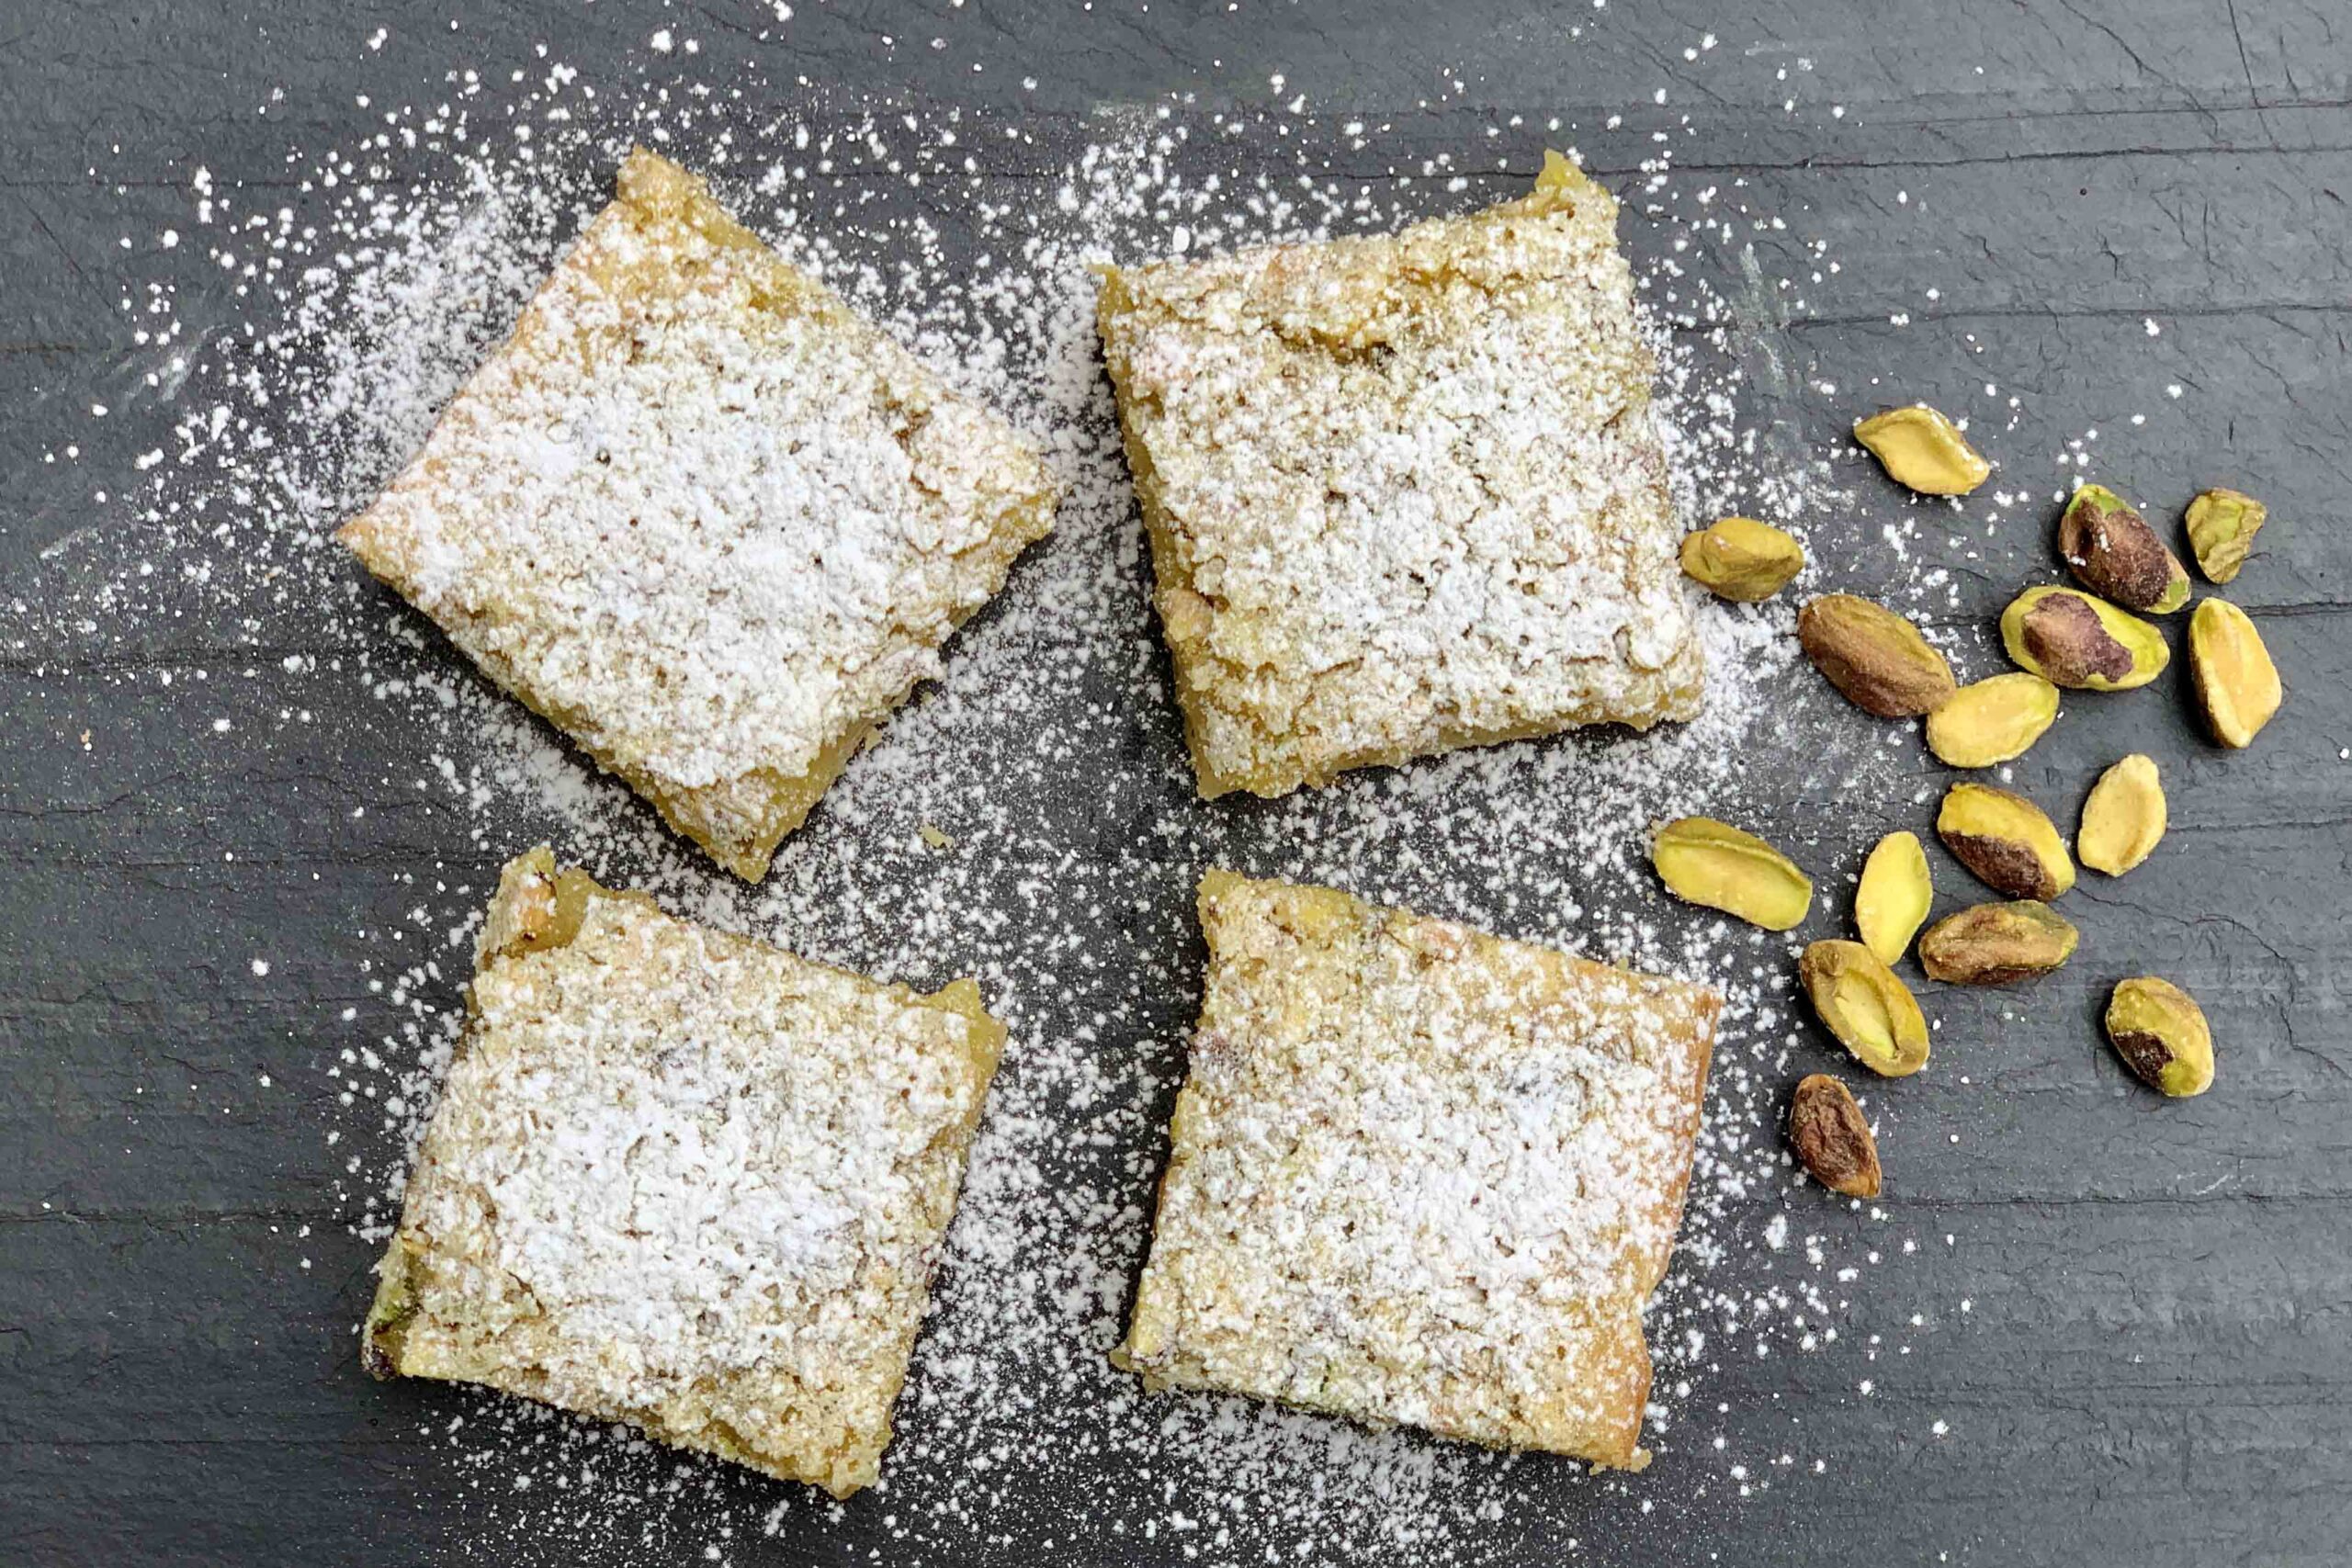
If you like lemon bars, I think you’re going to like these even more. They are sweet and tangy like traditional lemon bars. With the addition of pistachios both in the crust and filling make them even better.
The crust is a traditional buttery-shortbread base. The pistachios are added to the flour, sugar and salt in a food processor and are finely ground. So you taste them but they don’t get in the way of the coarsely ground pistachios in the filling.
In an effort to not have to hand chop the pistachios for the filling, I thought I’d be clever and chop them in the food processor prior to making the crust. This turned out to be a bad idea as some nuts grind up too quickly while others are still whole. Coarsely chopping the pistachios with a knife is the way to go for this recipe.
I added more lemon zest than the original recipe called for as I want the lemon to shine. It was just the right amount of lemon – not too tart. If you really like lemon, you may want to add an additional teaspoon of zest.
These are perfect anytime of year but especially now when we all need a bit of extra brightness on long winter days. They are also very easy to prepare.

Lemon-Pistachio Bars
Ingredients
Crust
- The Crust
- 1/4 cup shelled unsalted pistachios
- 1 cup all-purpose flour
- 1/4 cup confectioners' sugar
- 1/2 teaspoon kosher salt
- 1 stick 1/2 cup cold, unsalted butter, cut into small pieces
Filling
- 2 eggs
- 1 cup sugar
- 1/2 teaspoon baking powder
- 2 tablespoons all-purpose flour
- 2 teaspoons grated lemon zest from 1 large lemon
- 4 tablespoons fresh lemon juice 1 to 2 lemons (see Notes)
- 1/3 cup shelled unsalted pistachios roughly chopped (see Notes)
- Flaky sea salt such as Maldon
- Garnish with confectioners' sugar
Instructions
- Preheat the oven to 350°F. Line an 8-inch square pan with parchment paper.
- In the bowl of a large food processor, place 1/4 cup pistachio nuts, flour, sugar and salt and pulse until pistachio nuts are finely ground.
- Add butter and process until well combined, about 1 minute. Crust should hold together when you press a small amount between your fingers. (It will not come together in the food processor bowl like a ball of dough.)
- Firmly press the crust mixture into the bottom of the lined pan using your fingers or the flat bottom of a glass or measuring cup. You may need to use the back of a spoon for the corners. If the crust sticks, place a piece of parchment paper on the dough before pressing. Trim parchment paper so it’s close to the top of the pan, if needed.
- Bake the crust until lightly browned, about 20 to 25 minutes.
- While the crust is baking, in a medium bowl, whisk together eggs, sugar, baking powder, flour, lemon zest, lemon juice and 1/3 cup pistachios. Sprinkle with flaky sea salt.
- When the crust is baked, carefully pour the filling into the pan.
- Bake until set, about 20 to 25 minutes. If the top doesn’t look great, don’t worry as you’re going to sprinkle it with confectioners’ sugar.
- Transfer to a cooling rack and let cool completely.
- Remove from the pan with parchment paper and transfer to a cutting board. Cut into 2-inch squares on the parchment paper. A large chef’s knife works well for this. Remove bars from parchment paper after cutting them.
- Serve immediately or transfer to an airtight container and store for up to 5 days in the refrigerator (see Notes).
- Sprinkle with confectioners' sugar just before serving.
Notes
* Before squeezing the lemon, heat it in a microwave for about 20 seconds and then rub it back and forth on the counter top. This easy two-step process results in more juice per piece of fruit.
* Since these bars have eggs in them, it is not recommended that they sit at room temperature for more than a few hours.
Source: Variation on recipe from New York Times Cooking

I cannot believe you just posted this recipe. I haven’t made lemon bars for years, but I actually just dug up my old recipe to make them for a baby “sprinkle” this weekend. The addition of pistachios sounds much more interesting. I’m going to give them a try. Thank you!
Susie – What perfect timing! I hope you liked them. I made them for dessert with my parents.